![]() High pressure die casting is similar to bumblebee flight; both are theoretically impossible. However, more than 150 years of effective operation, with ever-increasing productivity and component quality, have demonstrated that pressure diecasting is intrinsically robust and capable of reaching high levels of process capability. Even in the best-run shops, scrap occurs, and below we discusses the diagnosis, causes, and treatment of flaws that may arise in zinc die castings, all of those issues are same to aluminum die castings and magnesium die castings
High pressure die casting is similar to bumblebee flight; both are theoretically impossible. However, more than 150 years of effective operation, with ever-increasing productivity and component quality, have demonstrated that pressure diecasting is intrinsically robust and capable of reaching high levels of process capability. Even in the best-run shops, scrap occurs, and below we discusses the diagnosis, causes, and treatment of flaws that may arise in zinc die castings, all of those issues are same to aluminum die castings and magnesium die castings
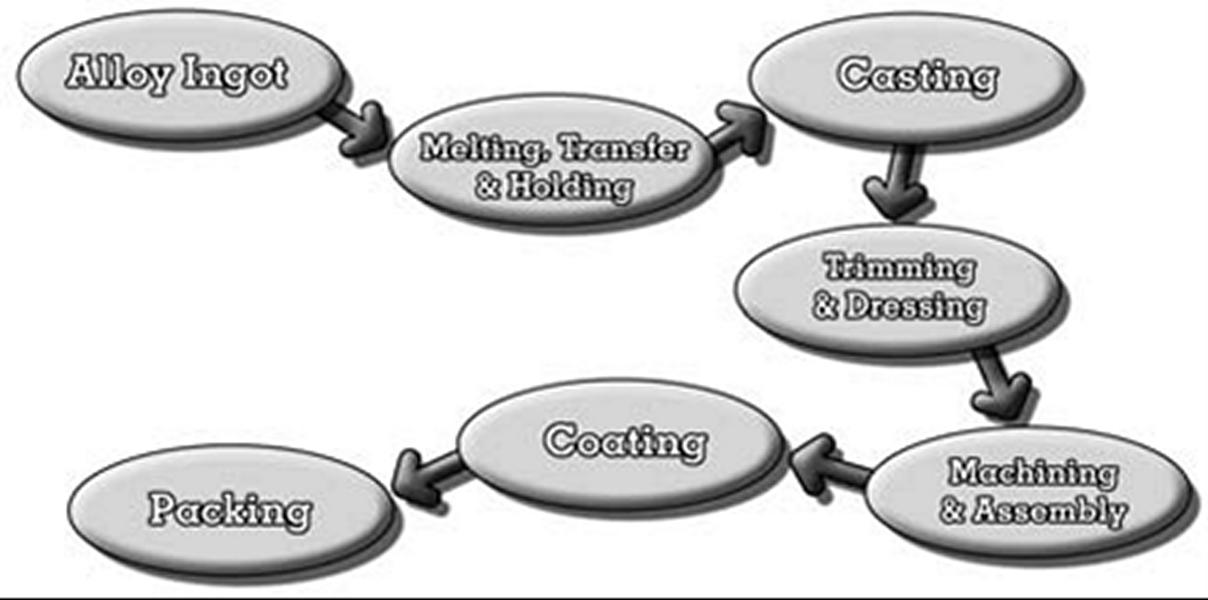
There are several ways to organize flaws in order to provide a consistent treatment of the subject. In this article takes a step-by-step approach, from receiving the alloy ingot to dispatching the finished product and presents information on each type of fault at the point where it happens. Other methods of identifying flaws and various fault-finding systems will be discussed later. The process stages are listed below:
In addition, runners and scrap will be recycled at various phases, and inter-process storage and handling must be considered. Not all castings will go through every procedure.
Zinc Alloy Ingot Specifications:
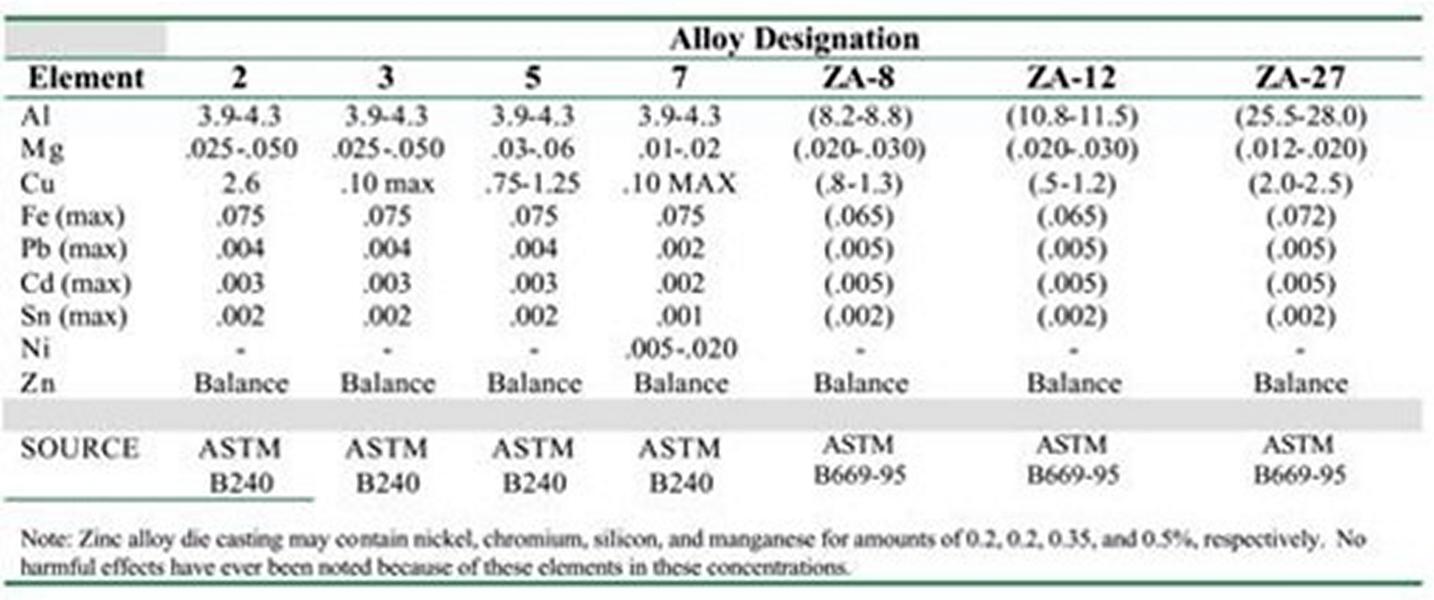
The compositions of zinc casting alloys were methodically developed over a 75-year period. The alloying element ranges have been tuned, and the maxima for dangerous contaminants have been carefully determined. To make reliable castings, ingots that meet internationally accepted requirements must be used. Furthermore, the alloy quality must be maintained during the melting and casting operations to ensure that the cast components meet the casting composition criteria.
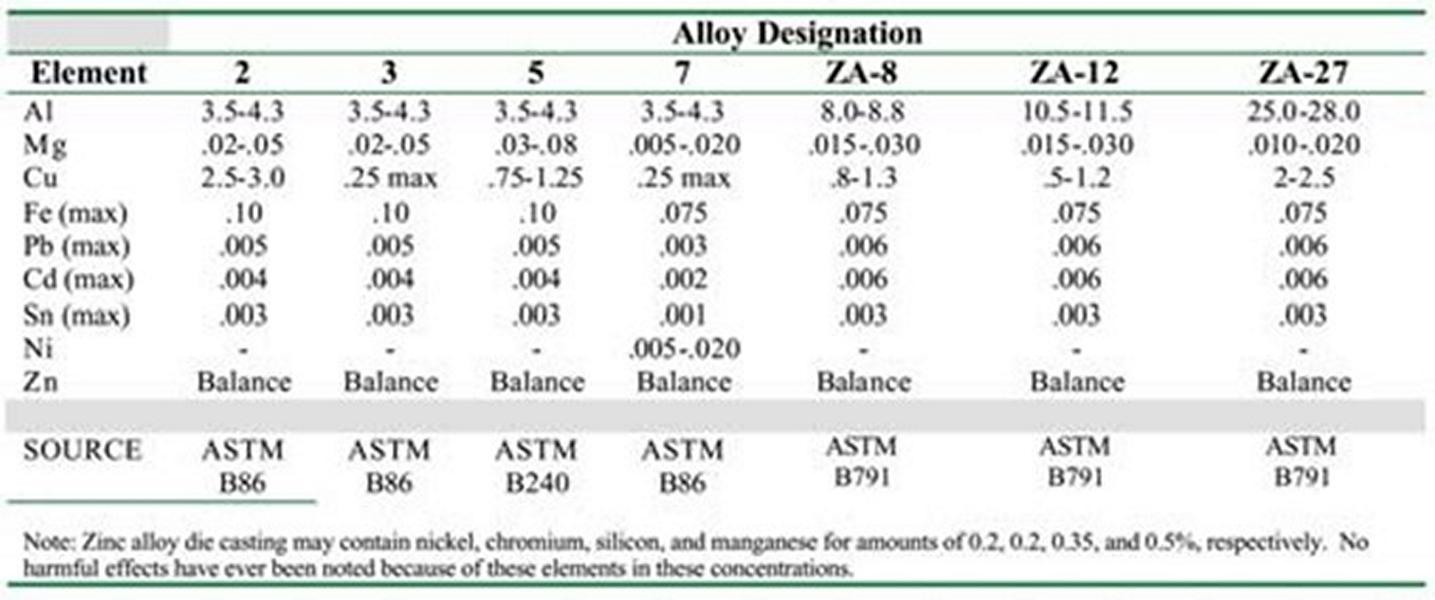
The minor discrepancies between the ingot (table 1) and casting (table 2) standards for each alloy type are intended to properly account for variation caused by regular processing and recycling processes. The usage of off-spec ingots, particularly those loaded with highly toxic impurities like lead, tin, or cadmium, is never justifiable.
The alloys are divided into three families: 4% aluminum alloys (Zamak 3 and 5, as well as Nos 2 and 7), higher aluminum ZA alloys (Nos 8, 12, and 27), and copper alloys (A cu zinc 5 and 10).
In addition, certain other alloys have not been commercially accepted. Almost all zinc alloy castings are fabricated in Zamak No3 or No5, with others specified only when specific qualities are required.
Effect of Contamination
The effects of contaminating elements, such as lead on castings, are comparable throughout alloys. The specific impurity maximum indicated reflect the variable severity of the effect as well as the ease with which ingots can be manufactured with low trace element levels.
Lead, Tin, and Cadmium
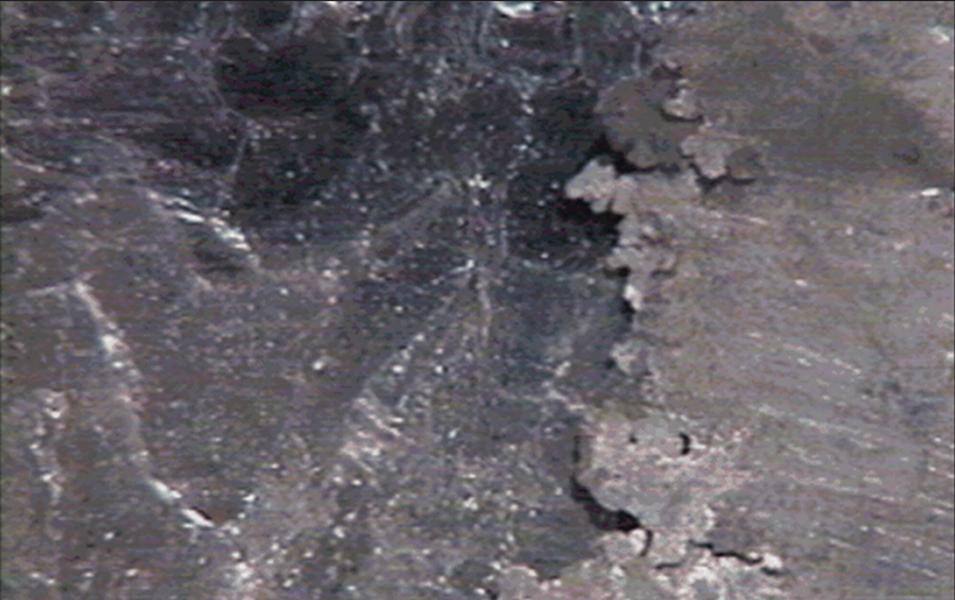
These elements, together with the comparable but less common indium and thallium, can cause catastrophic failure by intergranular corrosion.’Impurities segregate to grain boundaries, facilitating intergrain corrosion, particularly in warm, humid environments. Castings swell and break up, resulting in mounds of grey powder (figure l).
If magnesium levels are kept above the minima, the effect is insignificant in castings containing up to the prescribed maxima of these pollutants. Preventative methods include proper ingot purchasing and good housekeeping to avoid contamination from re-melt or the shop environment, such as soldering.
Iron
![]() Iron is only slightly soluble in zinc, and excess iron combines with the aluminium in the alloy to generate the intermetallic complex iron aluminide (FeAl3). This compound is extremely hard, and if it enters the casting, it can create machining issues, excessive tool wear, and polishing issues, as particles will stand proud or rip out. Excessive amounts can limit the alloy’s fluidity, and hence its ability to fill dies. Finally, if concentrated in stressed places, the strength and ductility may decrease. There is evidence that the size of the particles, rather than the total amount present, determines machinability because iron comes from the melting pot. The key protection is to keep metal temperatures under control.
Iron is only slightly soluble in zinc, and excess iron combines with the aluminium in the alloy to generate the intermetallic complex iron aluminide (FeAl3). This compound is extremely hard, and if it enters the casting, it can create machining issues, excessive tool wear, and polishing issues, as particles will stand proud or rip out. Excessive amounts can limit the alloy’s fluidity, and hence its ability to fill dies. Finally, if concentrated in stressed places, the strength and ductility may decrease. There is evidence that the size of the particles, rather than the total amount present, determines machinability because iron comes from the melting pot. The key protection is to keep metal temperatures under control.
Nickel, chrome, manganese, and silicon
Excessive levels of these components have the same effect on the casting as extra iron. It should be noted that nickel is not a contaminant in alloy No 7; rather, the little amount stated (less than the solubility limit) is an intentional addition to reduce intergranular corrosion in this magnesium-free, high fluidity alloy.
Effect of Alloying Elements
Aluminium
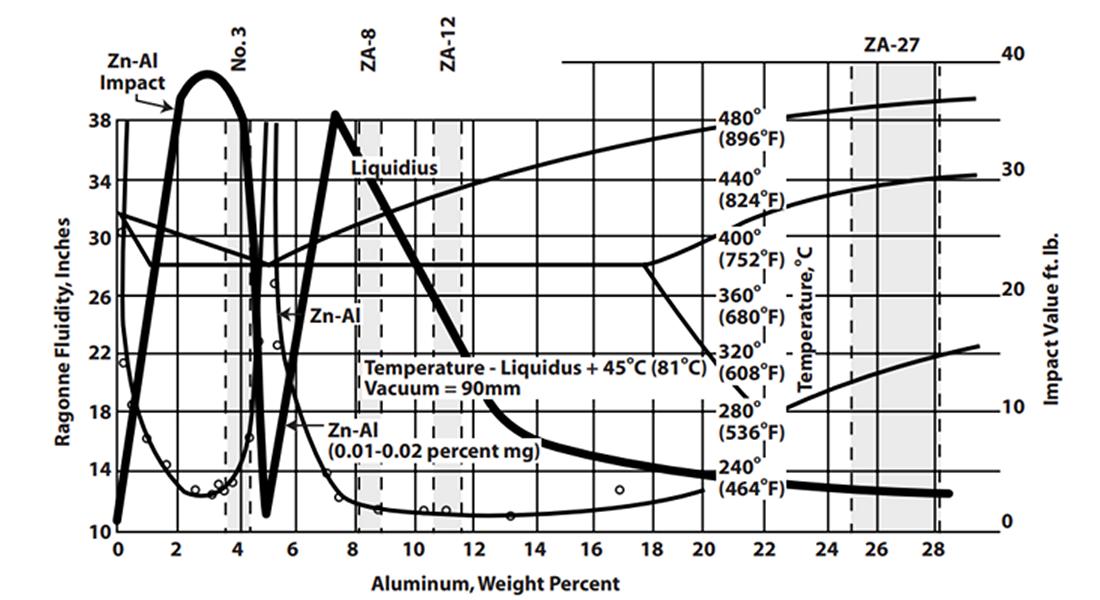
Except for Acuzinc alloys, aluminum is the most common alloying element. Both the strength and castability of the alloys are dependent on their level being within specification. Properties can change quickly outside of the very limited ranges stated, particularly in zinc alloys 2, 3, 5, and 7.
Excess aluminium in these 4%Al alloys significantly reduces impact strength (Figure 2), hence no aluminium should be picked up during processing. If the aluminium level falls below the prescribed minimum, the effects are less noticeable. Possible implications include a tendency toward hot ripping, which reduces strength, decreased fluidity, and an increased tendency for the alloy to cling to the die (soldering).
![]() Variations in aluminium content have a less noticeable effect on characteristics in higher aluminium ZA alloys, resulting in broader ranges allowed. However, like the 4% alloys, the compositions have been optimized to provide the optimum combination of characteristics, and exceeding the limits will result in modifications that may be deleterious.
Variations in aluminium content have a less noticeable effect on characteristics in higher aluminium ZA alloys, resulting in broader ranges allowed. However, like the 4% alloys, the compositions have been optimized to provide the optimum combination of characteristics, and exceeding the limits will result in modifications that may be deleterious.
Magnesium
Although the magnesium addition has a strengthening effect, its primary purpose is to prevent inter-granular corrosion in alloys containing lead, tin, and other metals at levels up to the permissible maximum. Castings containing less magnesium than the range minimum may corrode in service. A magnesium level exceeding the permissible range might cause hot ripping, resulting in a loss of strength or coating difficulties. High magnesium content lowers the fluidity of the alloy, which may cause filling issues.
Copper
The addition of copper to the basic 4%Al alloy increases strength and hardness at the expense of ductility and causes the alloys to change dimension more during aging. Impact strength in high copper alloys also decreases with ageing. As a result, alloys that fall outside the applicable copper limitations will have qualities intermediate to those of the specified alloys.
The copper component of the ZA alloys has a significant impact on their mechanical properties. In general, high copper reduces ductility, while low copper reduces tensile strength.
The principal alloying addition in Acuzinc alloys is copper, which gives greater hardness and high temperature strength than other zinc-based alloys. The relative copper and aluminium levels of Acuzinc alloys have been optimized to balance characteristics and castability. Because the high copper level occurs in a distinct phase system, its effect on dimensional ageing change may differ from that reported in 4%Al alloys.
Metal Melting, Transfer, and Holding
Except for alloys ZA-12, ZA-27, and Acuzinc10, which attack iron and steel at an unacceptably high rate, zinc alloys can be melted and stored in metal containers. This feature enables them to be cast by the hot chamber process, which employs an immersed injection system.
However, this valuable feature is only achievable through strict temperature control. Below roughly 450°C, the zinc alloy dissolves iron at a slow enough pace to allow the usage of metal parts in contact with the alloy. Because the rate of reaction grows exponentially with temperature, it is susceptible to modest temperature fluctuations.
The reaction occurs between aluminum in the alloy and iron in the crucible and machine parts.
Aluminium + Iron > Intermetallic particle
3Al + Fe > FeAl3
The iron aluminide intermetallic floats to the surface and reacts with the oxide layer to generate dross. If the dross is stirred into the metal, or if the pot level falls so low that sub-surface metal is sucked into the gooseneck, the casting will contain hard particles, resulting in the flaws indicated under iron in the contamination section.
Excessive temperature also causes magnesium loss because it is a volatile element that is cooked away. Low magnesium exposes the casting to significant corrosion difficulties in service.
It is worth noting that the overall melt temperature is not the sole factor to consider. If there is a hot spot in the furnace, such as a badly calibrated burner, the high temperature will cause iron pick-up. In severe circumstances, the crucible can be eaten through, leading in a run-out.
![]() Recommended metal casting temperatures are:
Recommended metal casting temperatures are:
|
Zamak No 2,3,5,7 |
415-4S0°C |
|
ZA8 |
420-445°C |
|
ZA12 |
465-495°C |
|
ZA27 |
550-580°C |
|
Acuzinc 5 |
~ 480°C |
|
Acuzinc 10 |
~ 5S0°C |
When ZA alloys, particularly ZA-27, are melted, they tend to gravity separate into layers rich in aluminum and zinc. Vertical stirring will blend the melt; strong stirring should be avoided, as it will promote oxidation. Once blended, the melt should remain steady. It is critical that any dross layer created is not presumed to be separated and stirred in. ZA-27 should not be stored below 540°C because any iron in solution precipitates as massive intermetallic particles.
The melting and holding of on-specification ingots should be trouble-free as long as adequate temperature control is maintained and no unintentional contamination occurs. When remelting runners and scrap, various aspects must be considered.
The returns must be strictly segregated, especially in shops that also melt aluminum alloys. Mixing some aluminium runners with the 4% zinc alloys produces castings with a high aluminium content, making them brittle. The identical problem will occur if ZA alloy is combined with normal alloy.
Direct remelting of swarf, flash, and other light gauge surface-contaminated material produces excessive dross and has the potential to pick up impurities. Such material is best treated separately so that the composition of the re-melted ingot may be determined. Dross should be treated individually for identical reasons. The flux tends to extract magnesium, especially when the metal is warmed. Electroplated castings require special attention. During melting, the electroplate skin remains on the surface and can be skimmed. The plate should not be broken up and mixed into the melt because the nickel, in particular, may create hard spots.
During melting and casting, the alloy loses a small amount of magnesium (by volatilization) and aluminum (via interaction with iron and subsequent removal as dross). Continuous remelting of the same metal would eventually result in out-of-spec castings. Tests on No3 alloy have indicated that it takes seven cycles to reduce the magnesium to less than the specified level. To avoid this eventual degradation, virgin ingot must be supplied continuously into the process.
Zinc die Casting defects
Below are common listed defects in zinc die casting, for aluminum die casting, magnisium die casting, there will be pretty much the same issues as zinc casting,
Internal Defects in zinc die casting
Shrinkage Porosity
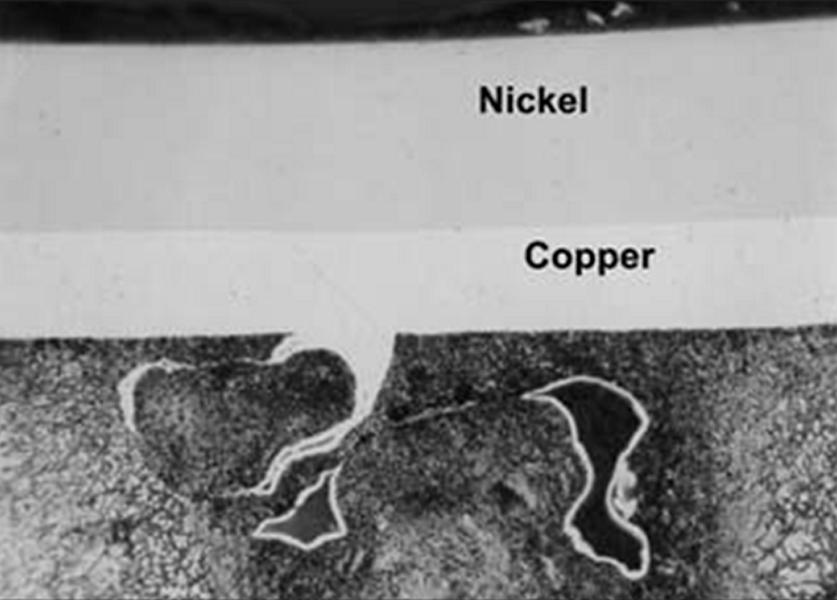
As the alloy transitions from liquid to solid, it shrinks by several percent of its casting volume. A void forms if additional liquid metal is not available to fuel the shrinking. This is shrinking porosity. It often occurs in isolated heavy portions as huge irregular holes (figure S), but it can also be in an interdendritic, crack-like shape, particularly in long freezing range alloys such as ZA-27 and Acuzinc.
Internal porosity may be disclosed if surfaces such as flanges or bores must be machined, resulting in rejection. Porosity can also lead to tool wear and drill drift during machining processes. The influence on strength will be determined by both the distribution and the quantity of porosity. It is important to recall that the “book” strength ratings stated for the alloys were achieved on specimens with typical porosity levels.
To limit shrinkage porosity, increase the metal pressure and make sure the gate is thick enough to be active during solidification. The plunger should not creep so far that it hits the bottom of the gooseneck, which could result in a lack of pressure on the metal. The packing time must be sufficient to allow complete solidification; otherwise, metal will be pulled out of the cavity as the plunger returns. Local cooling may minimize hot spots and hence prevent the production of isolated patches of liquid metal, which, when frozen, produce pores.
Interdendritic porosity can lead to leakage in pressure-tight components. The longer the alloy’s freezing range, the greater the likelihood of leaking. Casting at a low die temperature thickens the casting skin and reduces the possibility of leaking. However, this process may be hampered by the necessity for a high enough die temperature to provide a desirable surface look. Die face temperatures typically range from 170°C to 240°C.
Gas Porosity
As the die fills quickly, enormous volumes of gas can become trapped. Following high-pressure solidification, the gas forms quasi-spherical bubbles, usually around the centerline (figure 4). Gas and shrinkage porosity can coexist; in this case, the gas tends to round out the shrinkage porosity
Gas porosity causes the same faults as shrinkage porosity, however leaking is less likely to occur since gas holes are rarely interconnected. Furthermore, gas porosity is the primary cause of blistering in castings. If the alloy is weak, as a result of being heated to high temperatures, the tremendous gas pressure in the pore can blow away the surrounding metal skin. Increasing the cooling time and/or decreasing the die temperature can reduce the occurrence of blistering soon after ejection.
Ideally, the amount of gas trapped in the cavity should be minimized. This is accomplished by employing the biggest feasible first stage stroke and the longest possible fill time (while keeping in mind the conflicting necessity for short fill periods to achieve acceptable surface appearance). Vents should be maximised and properly positioned. Keeping die spray to a minimal is advantageous. Porosity is often less of an issue, and certainly produces less blistering, when it exists in the form of many microscopic pores rather than a few large ones. Small pores are encouraged by using high metal speeds; gate speeds of 40m/s should be the goal. Vacuum die casting will eliminate this type of porosity.
Microporosity Defects in die casting
In addition to visible porosity, there will be porosity of a size that can only be observed with a microscope. This microporosity, if absent from the casting skin (as it frequently is), has no negative impact unless it is later exposed by polishing processes prior to surface coating.
Tears and Cracks
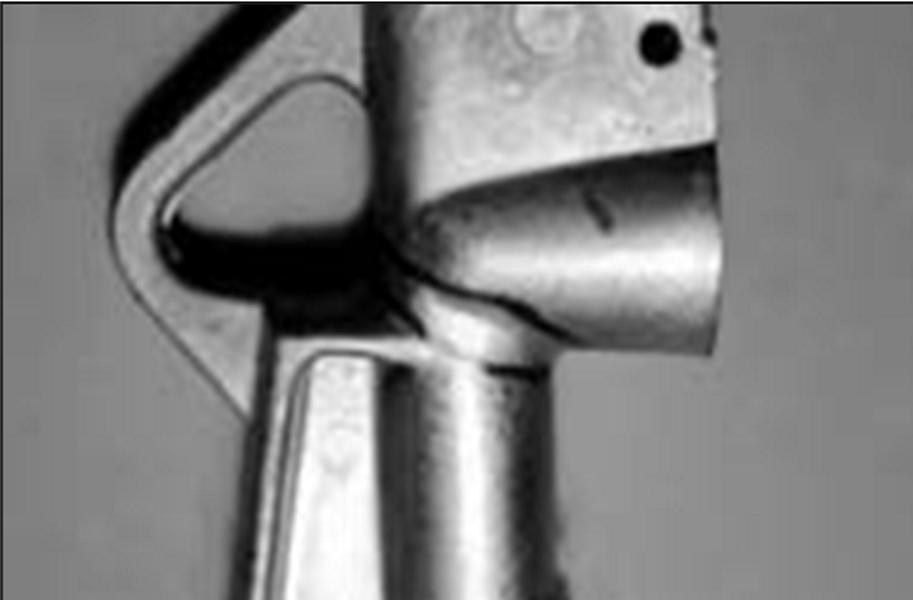
Hot tears, as the name implies, occur at temperatures near the solidification range. The crack is caused by casting failure under high strain, low stress deformation, and it often follows an uneven pattern (Figure 5). This contrasts with the considerably straighter cracks that can occur at lower temperatures under conditions of high stress and low strain. In addition, the appearance of the fracture faces varies between these two types of faults.
The form of the component contributes significantly to hot tearing. It happens when solidification shrinkage is limited to a small area, particularly if that area is also a hot zone. ZA-27 and Acuzinc are more prone to this fault than the other alloys, unless their aluminum content is below specification or they include an excess of magnesium. Except for die temperature distribution, casting parameters have no effect on hot tearing. Cooling the hot regions in the die can help solve the problem.
Cracking happens during ejection when excessive forces are generated as a result of the casting clogging in the die. This is frequently the result of toolmaking errors that caused undercutting, inadequate draft, or flash. Extending the cooling period to make the casting tougher and better able to absorb ejection stresses may help to prevent cracking. However, where the force is caused by the casting shrinking hard onto the die, extensive cooling times are ineffective, and ejecting sooner may be beneficial.
Inclusions issues
This is far less of an issue in zinc alloys than in those with stronger oxide film formers. Indeed, iron intermetallics created by inadequate melt management are frequently the only ones that pose problems in practice. The metal level in the pot must not fall to the point where subsurface metal enters the gooseneck.
Die Casting Surface Defects
Gold laps.
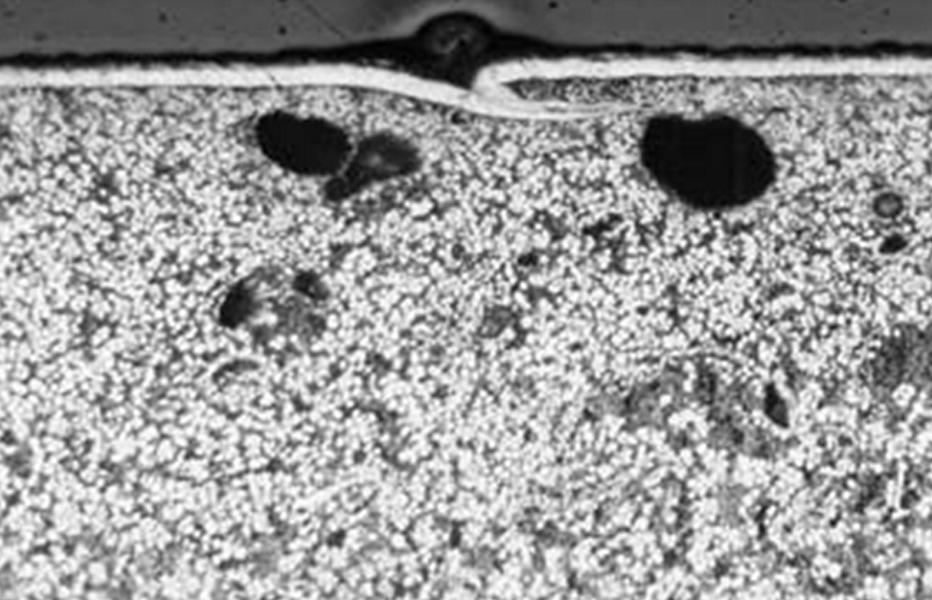
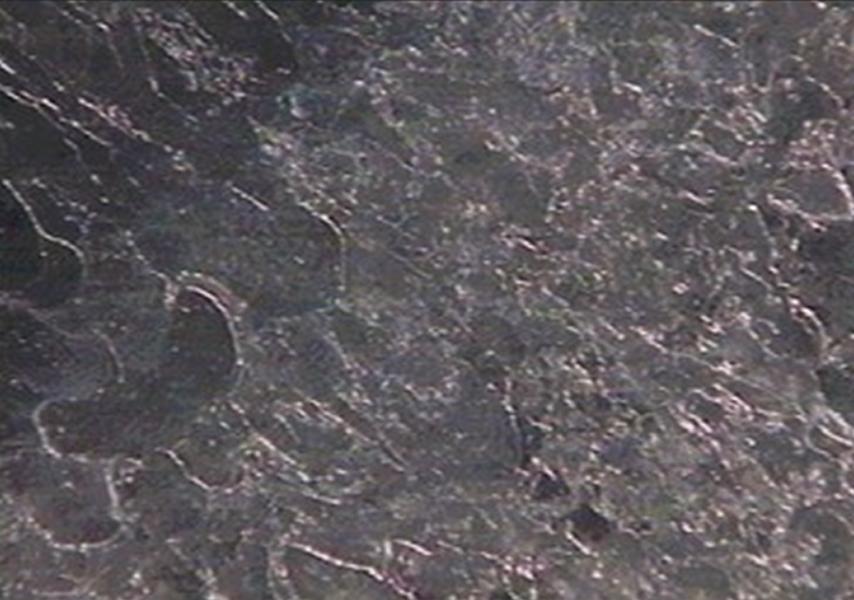
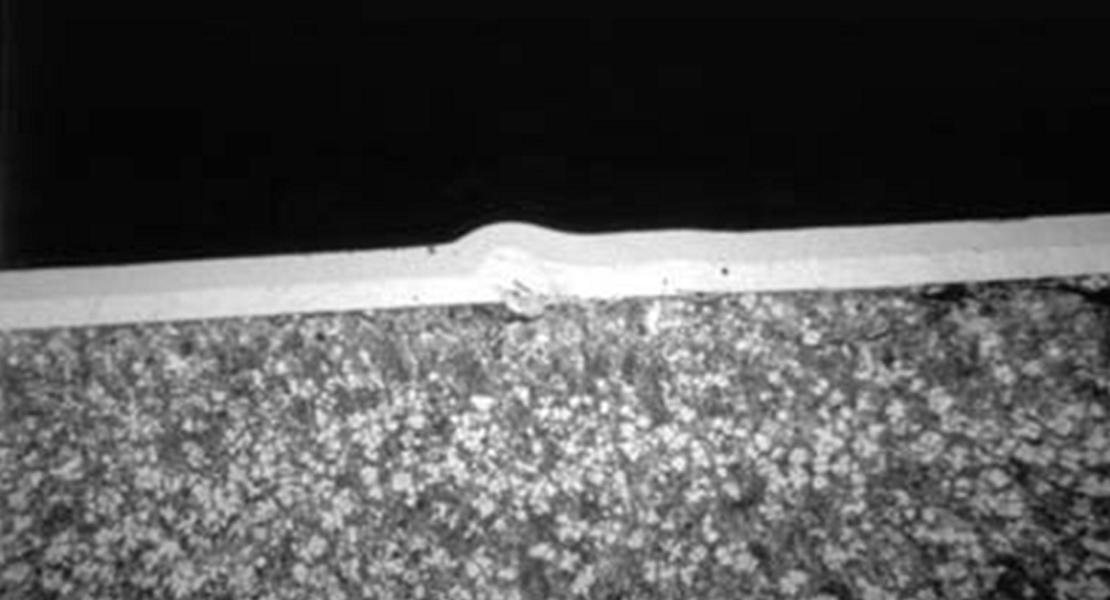
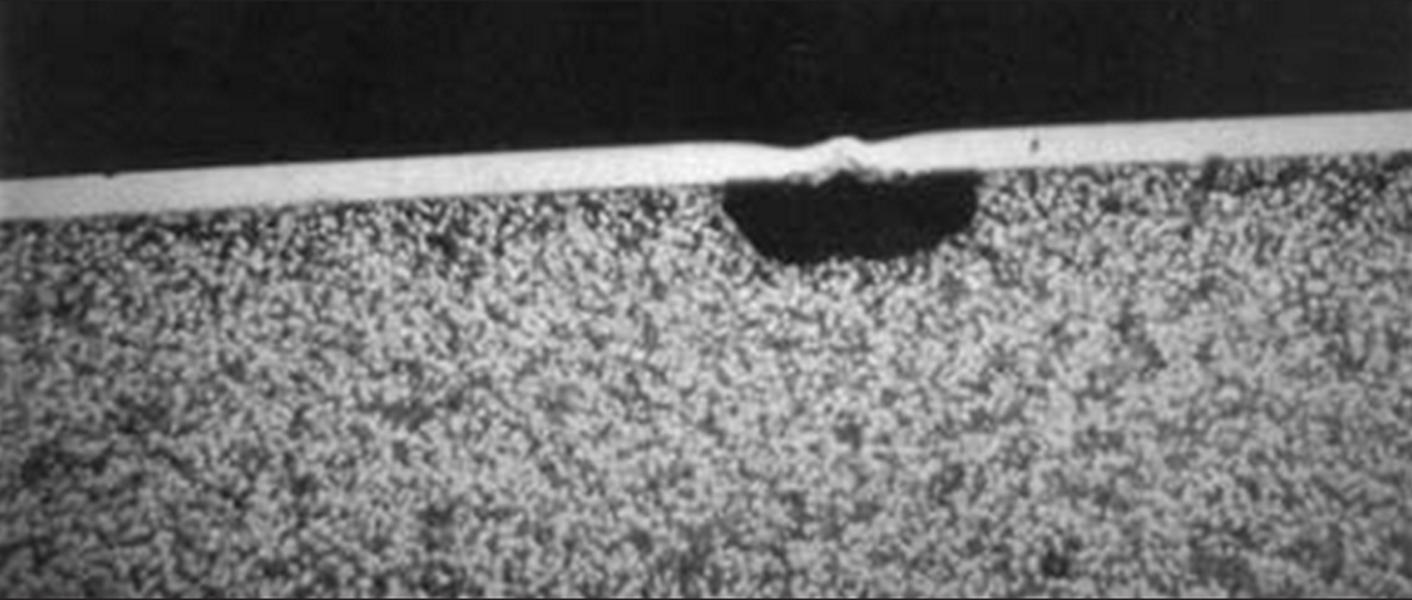
This defect (also known as flowmarks or cold flow) develops when streams of metal that have pre-solidified in contact with the die are not remelted back into the bulk of the casting when additional metal arrives. The surface appears as an uneven groove with a fish scale effect that varies in depth depending on the severity of the lap (figure 6). The cross-section displays the defining feature of a cold lap, which is the extent to which the surface fracture continues horizontally and generates a subsurface discontinuity (figure 7).
Cold laps degrade the appearance of castings and cause issues with future finishing procedures, particularly electroplating, resulting in coating failure. If severe, laps can impair the casting’s ductility. The cavity fill time and die temperature are the key casting parameters that influence the production of cold laps. Less important characteristics are flow pattern, flow distance, metal speed, die surface, and metal temperature. The thickness of the casting is crucial. Laps are more common in thin section castings.
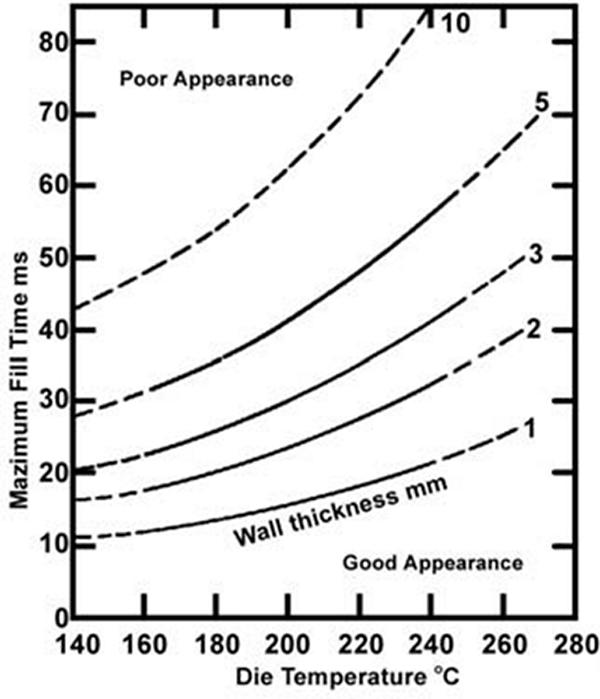
The link between surface appearance, wall thickness, die temperature, and fill time has been determined. The Surface Predictor (figure 8) can be used to determine the maximum cavity fill time and minimum die temperature that will result in an electroplatable surface. If the part is going to be painted, longer fill times and lower die temperatures are acceptable. A textured surface on the die can increase the maximum fill time by 50%.
![]()
Sometimes laps will appear even though the die is hot and the cavity fill time short. when this occurs they are usually associated with a swirl flow pattern that has trapped gas. The back pressure exerted by the gas at the end of cavity fill slows the encircling metal steams and hence produces the conditions necessary for local lap formation. In this case, it will be necessary to reduce the air entrapped in the die (see section on porosity) or modify the filling pattern in order to prevent the formation of such laps.
Lamination
Laminations are overlapping sheets of metal extending over a wider area and in a more uniform manner than cold laps. They can arise when there are problems with the machine injection system that results in the die filling in a series of pulses. A lamination will also form if the first stage stroke is too long with the result that the first metal entering the cavity is moving slowly and freezes off.
Misrun
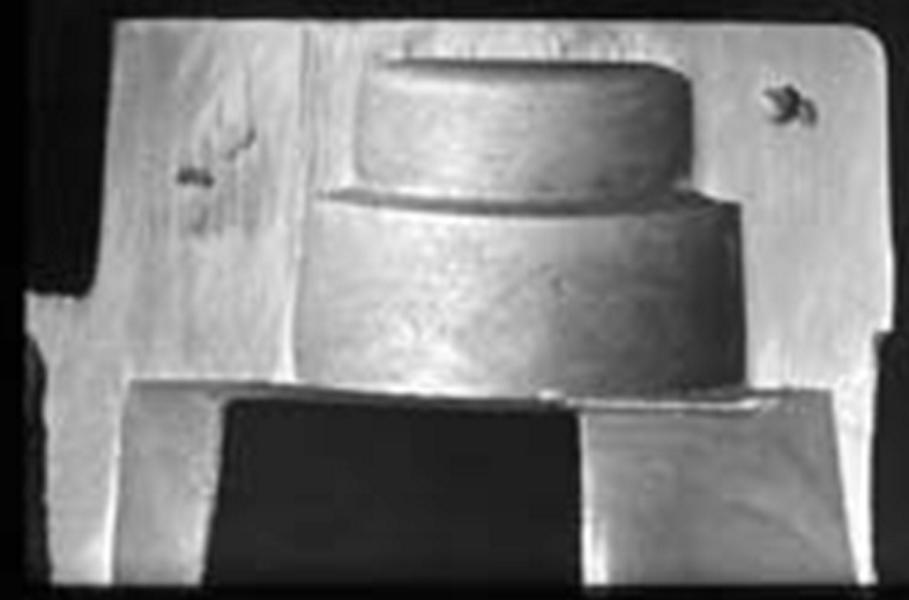
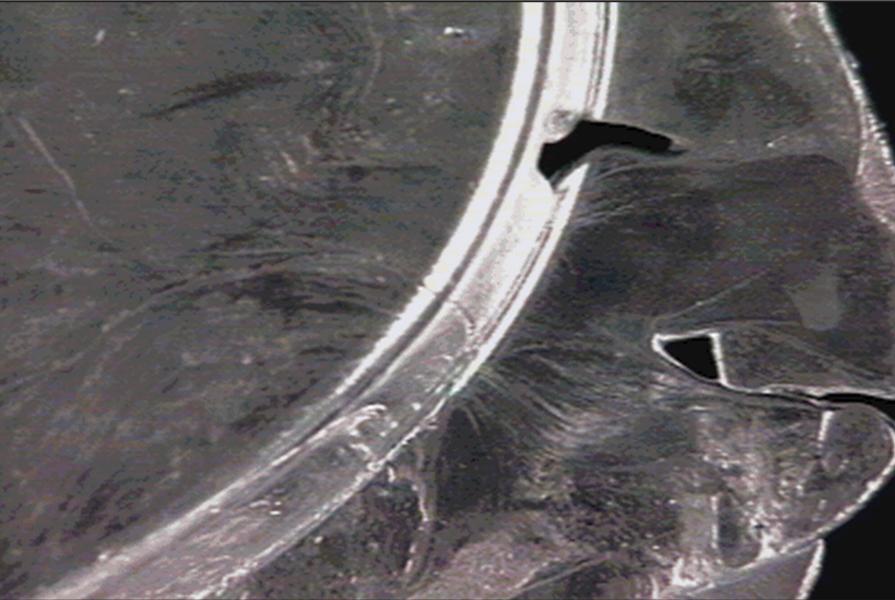
If the die is too cold and the fill time far too long, a complete casting will not be made. The metal will completely solidify before the cavity is filled and a misrun will result (figure 9). Small areas of incomplete make up, eg on the ends of fins or at the centre of swirls, may be caused by entrapped gas preventing metal completely filling the cavity. If the shot capacity of the machine is exceeded then the ”short shot“ will cause a misrun.
Shot or Spatter
Like laps these are the result of pre-solidification but appearance and cause are different. The defect can be purely surface, where it produces a rough texture, or can be imbedded as an “alloy inclusion” (figure 10). The “shots” are globules of alloy that have been sprayed out of the main metal stream and have not been subsequently adsorbed.
The spray can arise from the pulse as the first metal flows through the gate or can be eddies curling off the edge of the metal stream. This is why spatter usually occurs close to the gate. Sometimes the spatter is so loosely bound to the casting that some will be left behind on ejection. This material will then form ”inclusions“ in the next casting.
Raising the die temperature should improve matters but the main remedy will be to modify the gate so that a more solid front fill is achieved.
These depressions in the casting surface are less common in zinc alloy than some other metals and much less of a problem than in plastic mouldings. The cause is the same solidification shrinkage that is the driv- ing force for porosity formation. A local heavy section displays a surface sink rather than an internal pore when the temperature distribution is such that the heat centre is close to one surface. The final shrinkage then draws down the weak solid casting skin to form a depression (figure 11).
In alloys such as ZA-27 the appearance can be different. Here the defect is over a broader area and appears frosty. The long freezing range has modified the behaviour so that rather than a definite sink the shrinkage has drained the surface of eutectic liquid and left it rough and semi-porous.
The process remedies are the same as those given under shrinkage porosity. A redesign of the casting to reduce the hot spot should be carried out if this is possible.
Lakes
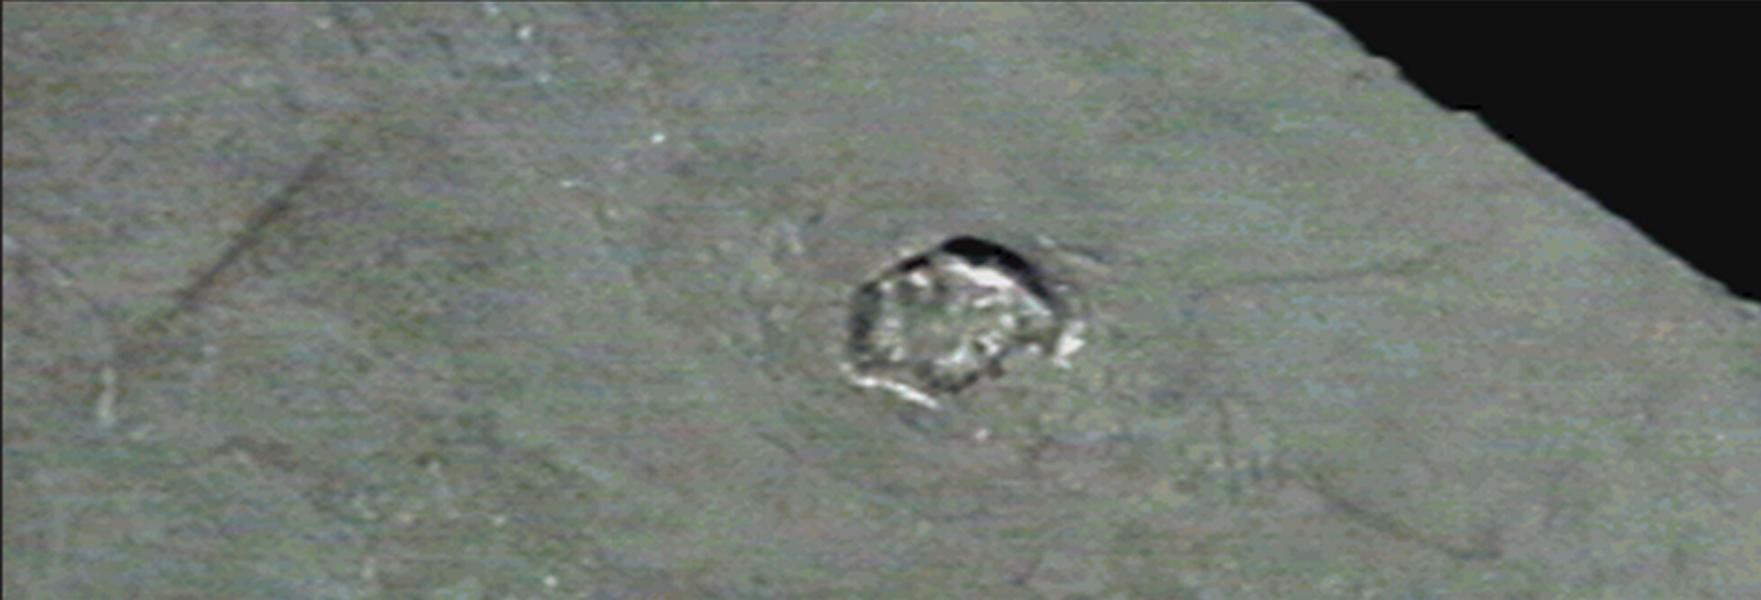
A lake is broad step in the casting surface with a step height of only 5 to S0 micrometers. It becomes very noticeable on components that are subsequently polished and plated where it produces an unsatisfactory ripple effect (figure 12).
Despite intensive investigation, the cause, and hence the remedy remains elusive. There is evidence that the term “lake” may be given to two defects of the same appearance, but different cause. when sectioned, some lakes show a different microstructure under the lake than in the bulk of the casting or the surrounding surface. Lakes of this type seem to be associated with early local solidification and the remedies taken for cold laps may be beneficial.
Other lakes, however, show no microstructural change. Additionally on thin castings, it is not uncommon for the defect to be through thickness, there is a depression on one side and a raised area on the other. In effect the casting has kinked by a few tens of microns. This indicates that the lake has formed when the casting was solid and it is tempting to speculate about restrained shrinkage producing an “oil can” distortion.
It is fairly clear that the defect is heat related and probably reflects temperature gradients within the tool.
Blisters
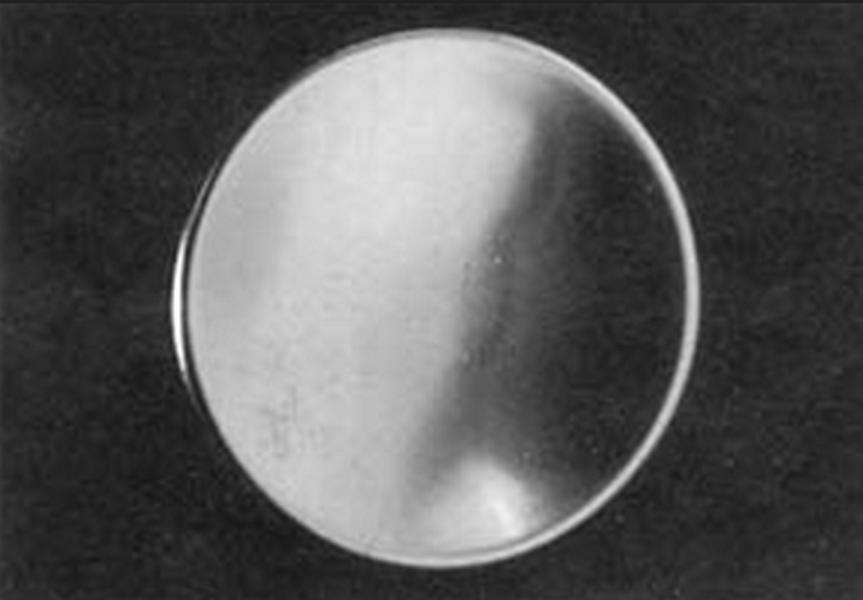
Cutting open these smooth surface protuberances reveals their hollow centre. Blisters are caused by expansion of the high pressure gas trapped in gas pores swelling the surface skin of the casting (figure 13). The blisters form when the alloy is too weak to contain the forces generated by the internal gas, when the casting is too hot. Blistering is prevented by reducing the temperature of the casting at ejection.
This is achieved by increasing the die cooling and/or increasing the die cooling time. Blistering will be alleviated by reducing the amount of trapped air (see section on gas porosity) and by using a high gate speed in order to refine the gas pore size.
Cracks
Surface cracks might have two main causes. The first form, which is commonly encountered at section changes, is hot tears, in which the high local strain induced by limiting shrinkage near the melting point has led in an intergranular fracture. The second type occurs when the casting sticks in the die, resulting in significant pressures upon ejection. These fissures are typically less intergranular and straighter than those caused by hot tears.
Hot tearing is more noticeable in long freezing range alloys, such as ZA-27, and is primarily due to component form. Local cooling of the issue region may be beneficial. (See the ingot section for more information).
Ejection cracking should be addressed initially by removing any die issues such as undercuts, inadequate taper, and rough surfaces. If the die temperature is reduced and the cooling period is increased, the casting will be stronger and hence better able to withstand ejection forces. However, if the sticking is caused by the casting shrinking onto the die, such as a hole into the core pin, early ejection to decrease shrinkage may be beneficial. To be effective as a separating agent, the die spray must adequately cover the die face.
Drag Marks
Rubbing between the casting and the die as the component is ejected causes scores along the line of draw (see figure 14). Drag marks are caused by insufficient draft, undercuts, and surface roughness, as well as inadequate die spray. It is impossible to avoid any scuffing when the casting shrinks closely against the component. In these cases, the highest possible taper is required, as well as optimization of the time (temperature) at which the casting is ejected.
Distortion
Bent castings, indentation or piercing by ejector pins, arise when the casting is too weak to withstand the ejection forces (figure 15). The die should first be checked for undercuts, insufficient draft and rough surface. The problem may then be controlled by lowering the temperature at which the casting is ejected. This is achieved by lowering the die temperature and/or increasing the die cooling time.
Erosion
Erosion produces wear and cavities in the die surface which can cause marks on the casting and ejection problems. It also reduces the life of the die. The molten alloy physically wears away the die at places where the metal stream hits the die at high speed. wear may also occur at points where the high speed metal eddies and produces hydraulic cavitation. In both cases reducing the metal speed will reduce the amount of erosion. Erosion is also reduced by lowering the die temperature. It is more likely to occur in dies that are tempered to the soft side of the hardness range.
Heat Checking
A crazy paving pattern of fins on the casting surface is due to the die surface breaking up (heat checking). The cause is the surface stress induced by the temperature cycle that occurs as each casting is made. The severity of the stress depends on the melting temperature of the alloy. As zinc alloys have low melting ranges, this defect is rare and is only seen in dies which have produced millions of castings.
Soldering
This is the build up on the die surface of a layer of alloy that is both physically and chemically adhering. The casting is marked where the stuck skin is torn away on ejection and the undercut produced by the build up also leads to scoring of the casting. Soldering is more likely when gate speeds are high and the die temperature is high. Die spray must be adequate in order to produce a protective layer on the steel surface.
Build up due to solder is difficult to remove from the die. This distinguishes it from build up due to excess die spray which usually can be wiped off.
Flash
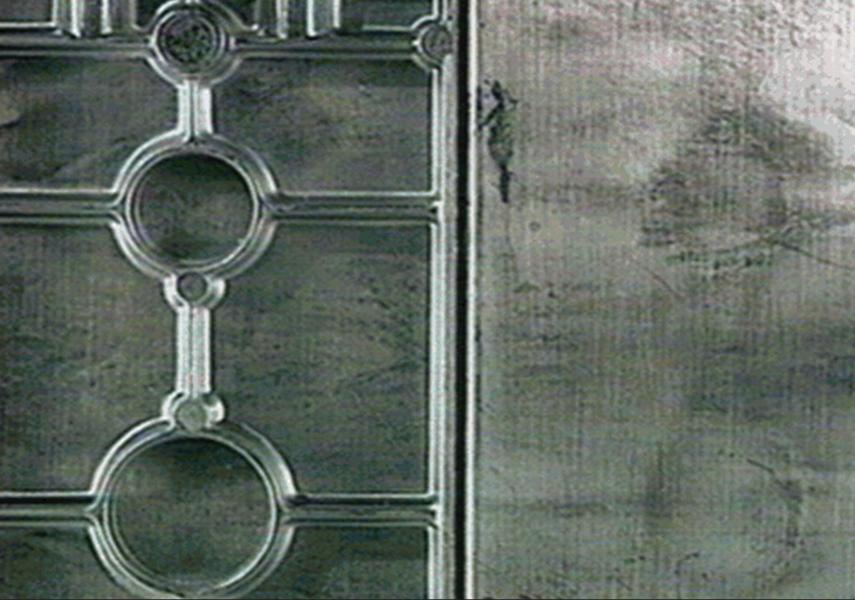
When metal penetrates between the mating faces of the die parts and the die halves, thin layers of extrane- ous material are left on the casting (figure 16). To prevent this the dies must be strongly built and perfectly shut out.
Even then thermal deflections may lead to gaps opening at operating temperature. If the machine locking force is inadequate for the size of casting being made, the dies will part and extensive areas of flash will be formed. Reducing the metal pressure will reduce the likelihood of the dies flashing. Also increasing the fill time, and thus reducing the temperature of the metal by the time it reaches the split line, will reduce penetration between mating faces.
Dimensional Consistency
The whole issue of dimensional tolerances is dealt with at length in another chapter of this manual. It is mentioned here because non-conformance can be considered a casting defect.
The reproducibility of an as-cast dimension shot after shot, is almost exclusively a function of temperature consistency. The factor that has the greatest effect is the temperature of the casting at the moment it is ejected from the die. Stabilising this temperature will improve dimensional reproducibility and aid the holding of close tolerances.
Because of metallurgical ageing effects, there will be slight shrinkage with time after casting. The amount is small and reproducible and is only an issue in components specified to the very tightest toler- ances. A low temperature heat treatment, typically a few hours at 95°C, can be used to stabilise the casting if necessary.
Trimming and Dressing
General problems in this area of the production operation are unacceptable change of contour due to over- removal of metal and distortion due to rough handling or alignment problems.
Break-off Defects
The thin gates possible in zinc alloy casting make break-off rather than press trimming an option in many cases. Break-off may be manual or mechanical in scroll or tumbler machines. A clean break depends on the shape and thickness of the gate.
Earring
Slightly curved gates can be broken but tend to leave “ears” on the casting when tapered gates are being used. Depending on the design and direction of bending even on a straight gate the land may be left proud of the casting.
Break in
Here the gate shape and direction of bending has led to the fracture entering the casting, thus leaving an undercut in the casting.
Gate line Porosity
Even when the gate breaks cleanly a witness is left on the casting. The metal exposed is different to the surrounding casting skin; it is typical of the interior of the casting and can thus contain porosity (figure 17). The thicker the gate the more likely it is for this porosity to be visible. The amount of gate line porosity will be influenced by the factors covered in the Porosity section of this chapter. Even when not visible the exposed microporosity may cause a problem after coating.
Press Trim Defects in zinc die casting
Scoring
Incorrect seating of the component and/or incorrect die alignment and clearances can lead to the trim die shaving the side of the casting.
Folding
when flash is thin and only extends a short distance, the ductility of the alloy is such that the flash may bend rather than be cut. The result is a thin fold of metal on the surface of the component. where this is a problem it may be better to deliberately flash across, rather than unsuccessfully shut out, so that there is a definite thickness for the trim tool to cut.
Finishing Defects in zinc die casting
Excessive removal of the surface will expose microporosity. This may not be visible but will lead to prob- lems if the casting is subsequently coated.
Barrelling/Vibropolishing Defects
Scaling
Excessive treatment of heavily lapped castings can lead to the laps lifting or becoming completely detached (figure 18).
Polishing Defects
Excessive metal removal will expose microporosity. The appearance of small bumps and comet tails are due to hard particles in the casting arising from metal contamination. As with barrelling and vibropolishing, the burnishing action only hides surface defects, such as laps. The underlying discontinuity is still present and can cause problems later.
Machining and assembly Defects in zinc die casting
Tool Wear
Rapid wear of cutting tools may be due to hard particles in the alloy arising from contamination of the melt. The causes and control measures to avoid this are covered in the Ingot section. wear and breakage can also be caused by the tools penetrating large gas or shrinkage pores. The avoidance of porosity is dealt with in the Casting section.
Exposed Porosity
Removal of the sound surface skin may expose porosity on machined faces, eg on flanges or down bores. The control of porosity is dealt with in the Casting section.
Fracture
Riveting and bending operations are frequently used to assemble zinc alloy castings. If the as-cast rivets and lugs are not well made, fracture of these features may occur. The surfaces need to be free of excessive laps and cracks (see Casting section). The ageing process that occurs after casting affects the ductility. It is at a minimum about three weeks after casting. The ductility of the alloy is much increased by deforming at moderately elevated temperatures.
Powder Coating zinc die casting defects
In this section defects that arise during coating, and to the coating in service, are examined. Only those defects caused by faults in the casting are covered. A more complete coverage, which includes defects in the coat itself, is given in the booklets “Plating of Zinc Die castings” and “Powder Coating of Zinc Die castings” which were published by the Zinc Development Association, London, UK.
Distortion
The strength of zinc alloy decreases with temperature so at paint stove temperatures it is fairly weak and even plating bath temperature has some effect. Thus if the castings are poorly supported or the jigs exert too high a spring force, the castings will be deformed. warping may also occur due to the stress relief of the casting. The rapid cooling during casting can lock in stresses caused by differential shrinkage. The level of stress depends largely on the component shape.
Irregular Surface
The fish scale appearance of cold laps will show through the plating layer and, if severe, may also show through the thicker paint coat. The boundaries of lakes will show as a ripple mark on the plated or painted surface. The causes and remedies of these defects are given in the Casting section.
Plating Defects in zinc die casting
Blisters
Blisters in the electroplate are a casting flaw (blisters and other defects can also be caused by plating process issues), and they are caused by the entrapment of soil, gas, and plating solutions in surface imperfections. The formation of gas behind the impermeable coating will cause it to blister and even shatter. The expansion caused by corrosion products produced by the reaction of the casting and trapped corrosive solutions will have a similar effect.
If the entrapment is caused by cold laps, both the casting surface and the plate may lift. Note that folds caused by flash being bent onto the surface will produce identical issues as laps. If put into service, the damage done to the plated layer will result in corrosion. (Figures 7, 19.)
Castings which have a surface containing cold laps or one in which gross porosity or micro-porosity has been exposed, are likely to produce blisters in the plated coat. Details on these defects are given in the Casting and Dressing sections.
Paint Defects in zinc die casting
Blisters
Blisters on a casting’s painted surface might be of two varieties. It is critical to distinguish between them since the corrective actions necessary are different.
Blisters of moderate size that may emerge on opposite sides of the casting are generated by gas porosity within the casting (figure 13). This can be verified by scraping off the paint coat or cutting the blister apart. It is a gas blister if the flaw is in the casting rather than the paint. The problem occurs because the zinc alloy is weak at paint stove temperatures, causing the casting to inflate due to high pressure gas inside the pores.
Stove temperature is crucial, and if the procedure allows for a variety of circumstances, the option of stoving for longer but at a lower temperature should be chosen. Castings that will be baked at high temperatures (200°C) must contain a minimum amount of trapped gas that is finely scattered.
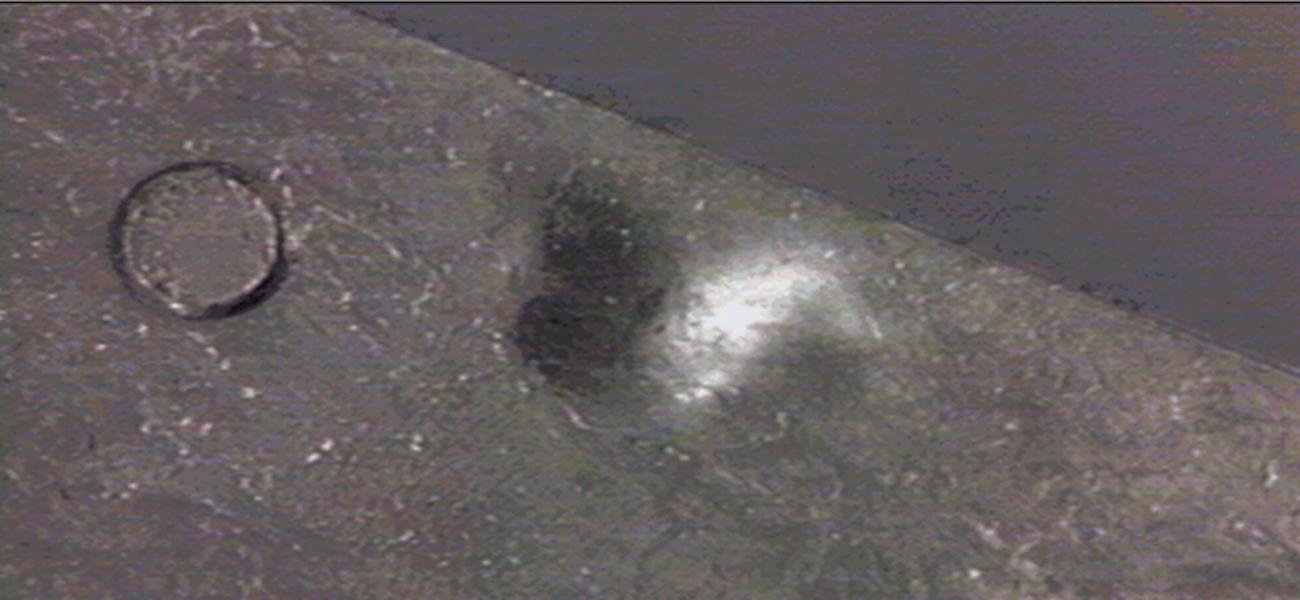
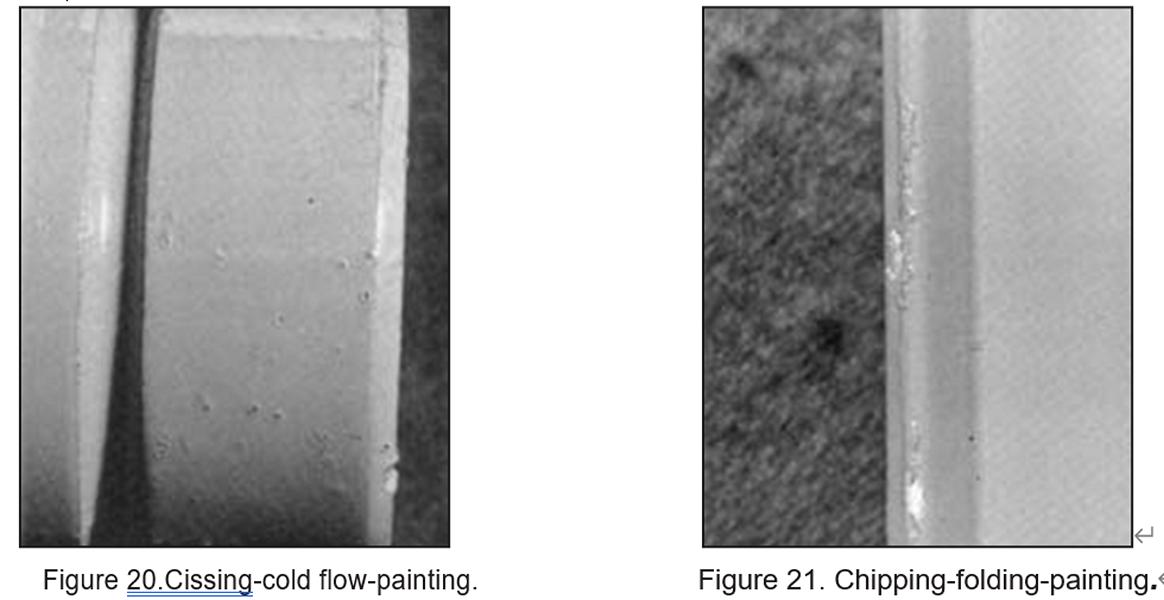
Smaller blisters are caused by gas rising from the casting surface and becoming caught in the paint film. Sometimes the gas escapes, but the solidifying paint is too hard to reconstitute a smooth surface, resulting in a blister like a miniature volcano (figure 20). To avoid these problems, the casting must be free of surface discontinuities that might trap gas and soil, such as cold laps, folds, and visible porosity. Baking before adding the organic layer will allow the casting to expel gas and solve the problem.
Chipped Paint
Paint peeling can sometimes be caused by a casting flaw or improper post-coating handling. If a fold (i.e., bent over flash) is painted and then subjected to impact, it may break off, revealing the underlying uncoated surface.
Handling, Storage, and Packaging
Poor handling might result in surface damage or distortion of the die casting. In multi-cavity tools, casting links between flimsy components might be effective for providing support. The amount of surface damage that can be accepted is determined by the quality requirement and coating used.
When naked castings are to be stored for any period of time, they must be dry. Damp circumstances promote the growth of white rust and surface corrosion. If the die spray or quench water has degraded, resulting in the development of acidic compounds, corrosion may be more severe. Castings should be coated or painted as soon as feasible after casting and polishing to reduce the risk of surface contamination.
Castings must be packed in dry materials, as damp cardboard creates acids that damage and blacken zinc castings.


0 Comments